Introduction
Creating stunning name art animation videos in Alight Motion is a great way to add a unique touch to your content. Whether for social media, personal branding, or creative projects, mastering 3D name animations in Alight Motion can elevate your video editing skills. This guide covers the best techniques, settings, and effects to make your name art animations stand out.
Introduction to Alight Motion
Alight Motion has emerged as a cutting-edge mobile application designed for video editing and motion graphics, catering to both amateur creators and professional video editors. This versatile platform offers a range of powerful features that facilitate the creation of dynamic multimedia content. Users can leverage vector and bitmap graphics, animations, and visual effects, allowing for the production of sophisticated video projects from the convenience of their mobile devices.
The application is renowned for its user-friendly interface, which simplifies complex tasks associated with video editing. Alight Motion supports multilayer editing, enabling users to manipulate diverse elements separately. Furthermore, the app incorporates features such as easing effects, speed adjustments, and a plethora of blending modes, which contribute to high-quality animations and professional-looking videos. With the addition of audio editing capabilities, users can also synchronize sound with motion graphics seamlessly.
Alight Motion has gained significant popularity among content creators, particularly in the realms of social media and digital marketing. Its accessibility on mobile devices makes it particularly appealing to younger audiences and aspiring digital creators. A strong community exists around the app, where users share tips, tutorials, and project files, fostering an environment of collaboration and learning.
Importing project files into Alight Motion can significantly enhance a user's creative workflow by allowing them to build upon existing projects or share assets with others. This capability also enables creators to maintain consistency across various projects, ultimately contributing to a more polished final product. By understanding the comprehensive features of Alight Motion, users can maximize their editing skills, making the process efficient and enjoyable. As a result, the ability to import project files serves as a crucial aspect of this powerful application.
Understanding Project Files in Alight Motion
In the world of digital content creation, especially in video editing and animation, project files serve as fundamental components that encapsulate the entire editing process. In the context of Alight Motion, project files are structured documents that save not only the artistic elements of your project but also preserve various settings and configurations necessary for rendering your final work. These files are crucial as they allow creators to pause their progress and return to their project seamlessly.
Alight Motion project files store diverse types of data, including layers, effects, animations, and keyframe settings. Layers, for instance, play a pivotal role in organizing different visual elements. Each layer might represent a distinct image, video, or text that a user is working on, enabling the manipulation of these elements individually or collectively. Effects can then be applied to these layers, enhancing the visual storytelling aspect of the project. Animation data is equally significant, as it encompasses the movements, transitions, and timings of elements within the project, contributing to the overall fluidity and engagement of the final product.
The significance of project files in Alight Motion extends beyond mere storage. They act as the blueprint for your creative vision, allowing for easier collaboration, troubleshooting, and iteration on the design. Whether a user is working on an intricate animation or a straightforward video compilation, understanding how these files function and what they include is essential for an effective workflow. This comprehension not only contributes to the efficiency of the editing process but also ensures that users can harness the full potential of Alight Motion's capabilities, fostering creativity in a structured manner.
Preparing Your Alight Motion Project File for Import
When embarking on the journey to import an Alight Motion project file, it is essential to ensure that the project file is adequately prepared for a seamless import process. The first step in this preparation is to verify the compatibility of the project file with the Alight Motion application. Alight Motion supports specific file formats, including .alm and certain other formats associated with motion graphics projects. Confirming that your project file adheres to the correct format is crucial for successful import.
Understanding the different file formats available for Alight Motion will help in streamlining the importation process. The .alm file format is the primary format utilized in Alight Motion, which encapsulates all project elements such as layers, effects, and assets. If you are working with files from other applications or previous versions of Alight Motion, be aware that these may require conversion before they can be imported. Utilizing appropriate conversion tools can facilitate this process and avoid complications.
Another vital aspect to consider is checking for any limitations that may affect the import process. Alight Motion may impose restrictions on the size and complexity of the project file. For instance, projects with an excessive number of layers, high-resolution media, or many effects may encounter performance-related issues during import. Therefore, reviewing your project for any elements that might exceed Alight Motion’s capabilities is advisable. This can include simplifying layers, reducing file sizes, or ensuring that all assets are optimized before initiating the import.
By adhering to these preparatory steps, users can enhance their Alight Motion experience, ensuring that their projects are ready for a smooth and efficient import process. This attention to detail can significantly minimize potential errors and improve overall project workflow.
Step-by-Step Guide to Importing Project Files
Importing project files into Alight Motion is a straightforward process that enhances your editing capabilities. To execute this seamlessly, follow these detailed steps. First, ensure you have the Alight Motion application installed on your device. If it isn't already, visit the relevant app store for your device type and download it.
Once you have the application installed, open Alight Motion. On the main screen, locate the '+' icon, typically found at the bottom center of the screen, indicating the start of a new project. Tap this icon to proceed. The next step is to navigate to the import option, which is usually presented as 'Import Project'. This option allows users to bring in existing project files.
Here, a file explorer will open. You can browse through your device’s storage to locate the Alight Motion project files you wish to import. It is vital to ensure that these files are in the correct format compatible with Alight Motion to successfully import without errors.
After locating the desired project file, tap on it, and you will see a confirmation prompt. Select 'Import' to initiate the process. Alight Motion may take a moment to load the project depending on its size. Once the import is complete, the project will appear in your project list, ready for further editing.
To enhance your familiarity with the app, it might be beneficial to open the imported project immediately and explore the different layers and elements. If you encounter any issues during this process, consulting the official Alight Motion support can provide additional help. Following these steps will assure a smooth experience as you integrate project files into Alight Motion.
Common Issues When Importing and How to Troubleshoot
Importing Alight Motion project files can occasionally lead to a range of unforeseen challenges, which may hinder the user experience. Understanding these common issues and their solutions can greatly enhance the efficiency of the import process. One frequent problem encountered is file compatibility; users sometimes try to import files from different versions of the application, which may result in errors. To resolve this, it is essential to ensure that the project files being imported are matched to the Alight Motion version currently in use. Keeping both the project files and application updated can prevent such issues.
Another common issue involves the import of media assets linked within a project file. If the original media files are not accessible or have been moved after the project file was created, the import may result in missing assets. To troubleshoot this problem, users should verify that all media files are properly located in their intended folders before initiating the import. Furthermore, it might be beneficial to maintain a structured file management system for ease of access.
Users might also experience performance-related challenges when importing large or complex project files. High-resolution images or extensive animations can lead to lag during the import process. As a solution, consider simplifying the project file or breaking it down into smaller, more manageable components to facilitate a smoother import. Clearing the app's cache and ensuring sufficient device storage can also improve performance.
Lastly, internet connectivity issues may affect cloud-based project imports. In such cases, verifying the stability of the internet connection is recommended. It is important to note that having a reliable Wi-Fi or data connection is vital for a successful import experience. Addressing these common issues proactively will help users troubleshoot effectively and ensure a successful import process for their Alight Motion project files.
Tips for Working with Imported Project Files
When working with imported project files in Alight Motion, effective management is crucial for achieving optimal results. To begin, it's essential to organize your layers systematically. Proper layer management allows for easier navigation through complex projects. Consider naming layers descriptively based on their contents or function. Additionally, grouping related layers can help streamline the editing process, enabling you to manipulate multiple elements simultaneously. This practice minimizes confusion and enhances overall workflow efficiency.
Another important aspect to consider is the application of effects. When adding effects to imported project files, it is advisable to use them sparingly and strategically. Overusing effects can lead to a cluttered presentation and may distract from the primary focus of your project. Instead, opt for subtle transitions and enhancements that complement your content without overwhelming it. Furthermore, experimenting with blending modes can yield interesting results while maintaining a cleaner aesthetic.
Performance optimization is also vital when handling imported project files. To ensure smooth playback and editing, consider working with proxy files or lower resolution versions of your assets during the initial editing stages. Once satisfied with your edits, you can switch back to high-resolution files for the final render. This approach not only improves performance during the editing process but also reduces rendering time when creating the final output.
Finally, regularly saving your project files can prevent loss of progress due to unexpected software crashes. Create backup copies of your projects periodically, especially after substantial edits or adjustments. By employing these tips and best practices, you can work more efficiently with imported project files, resulting in polished and professional outcomes in Alight Motion.
Exporting Your Finished Project
After successfully importing your Alight Motion project files and completing the necessary edits, exporting your finished project is the next crucial step. This process allows you to save your work in various formats and resolutions suitable for diverse platforms, enhancing accessibility and usability. Alight Motion offers a straightforward export feature, making it efficient to finalize your projects. To initiate the export process, navigate to the main menu and select the export option.
Users can choose to export their project in multiple formats, including MP4, GIF, and JPG. The choice of format is important, depending on the intended use of the project. For instance, exporting in MP4 is ideal for video content, while GIF is suitable for short animations. Selecting the appropriate format will ensure the project maintains its quality and visual appeal across different viewing platforms.
Moreover, Alight Motion allows you to adjust the resolution of your export. Higher resolutions are recommended for platforms that support high-quality viewing, such as YouTube or Vimeo, whereas lower resolutions may suffice for social media applications like Instagram or Twitter. Users should select a resolution that best fits their audience's needs while also considering the file size, as larger files may impact loading times and performance.
Another key consideration during the export process is the frame rate. Alight Motion provides options for frame rates, giving users the flexibility to create video content that meets their specific requirements. A standard frame rate of 30fps is often preferred for smooth playback, but adjustments can be made for different project needs.
In conclusion, mastering the export process of your Alight Motion projects opens the door to effectively sharing your work with a broader audience. By understanding the various formats, resolutions, and other settings available during export, you can ensure your projects achieve the desired impact and reach the intended viewers.
Frequently Asked Questions
When embarking on the journey of importing Alight Motion project files, users often encounter various queries that can significantly enhance their experience. This section aims to address some of the most common questions regarding the importing process, compatibility of project files, and the features available within the application.
One frequently asked question relates to the compatibility of different project file versions. Alight Motion allows users to import project files created in earlier versions of the application, thus facilitating a smooth transition for those upgrading their software. However, users should remain aware that while backward compatibility typically exists, certain features from newer versions may not function as intended in older project files. Therefore, it is advisable to always update the application to the latest version to ensure optimal functionality and access to newly introduced features.
Another prevalent inquiry concerns the types of files that can be imported into Alight Motion. The application primarily supports files exported from itself, but users can also import other media formats such as images and audio files. To enhance efficiency during the import process, users should ensure that their project files are saved in compatible formats before attempting to import them. This precaution will minimize the chances of encountering errors or issues that could impede the creative process.
Users may also be curious about the importing process itself. The application provides an intuitive interface that simplifies the task of importing files. By navigating to the appropriate section of the app, users can easily select and import their desired project files. It is advisable to refer to the official documentation or community forums for detailed guidance on potential troubleshooting during this step.
In conclusion, addressing these frequently asked questions can streamline the experience of importing Alight Motion project files, ensuring users can focus on unleashing their creativity while mitigating potential challenges.
Conclusion and Further Resources
In conclusion, the process of importing Alight Motion project files is not only essential for enhancing your video editing experience but also crucial for leveraging the app's full potential. Understanding the steps involved in importing files will help streamline your workflow, allowing you to focus on creativity rather than technical challenges. By following the outlined procedures and recommendations, users can effectively manage project files to ensure seamless integration into their editing process. This understanding is vital, especially for beginners who may find the file management system intimidating at first.
For those looking to expand their knowledge and skills further, several resources are available online. Alight Motion provides an extensive FAQ section and user guide on their official website, which covers various topics including project importing, exporting, and troubleshooting common issues. For visual learners, YouTube is a treasure trove of tutorials that guide users through the intricacies of using Alight Motion, including how to import files smoothly. Engaging with these video resources can offer practical insights and tips that written tutorials may not sufficiently cover.
Furthermore, community forums such as Reddit and dedicated Alight Motion groups on social media platforms are excellent places to seek advice and share experiences with fellow users. These communities frequently discuss recent updates, innovative project ideas, and specific challenges related to importing projects. Engaging with these platforms can provide not only answers to your questions but also inspiration to elevate your editing projects.
By combining the knowledge of best practices for importing Alight Motion project files with the wealth of additional resources available, users can significantly enhance their editing skills, enabling them to produce high-quality video projects with ease and efficiency.
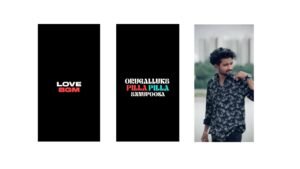
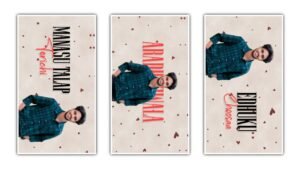
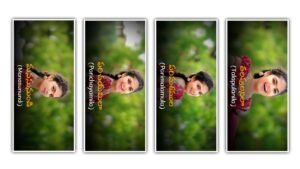
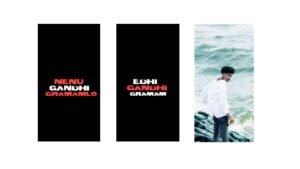
1. Choosing the Right Font and Style
The choice of font plays a crucial role in name animations.
Tips for Selecting Fonts:
- Use bold and stylish fonts for better visibility.
- Try script or calligraphy fonts for an elegant touch.
- Experiment with 3D-style fonts to enhance the animation.
Where to Find Fonts?
- Alight Motion's built-in font library.
- Download custom fonts from sites like DaFont and Google Fonts.
2. Adding 3D Effects to Name Animations
Steps to Create a 3D Name Animation:
- Open Alight Motion and create a new project.
- Add your name text and customize the font and color.
- Use the 3D Rotate Effect to give depth.
- Apply the Shadow Effect for a realistic look.
- Adjust Glow & Stroke for extra enhancement.
Pro Tip:
- Use Keyframe Animation to add movement and transitions.
- Apply Easing Effects to make motion smooth and natural.
3. Using Motion Graphics and Transitions
Best Transitions for Name Animations:
- Fade In & Out: Smooth text appearance.
- Zoom Effects: Creates a cinematic feel.
- Slide & Bounce: Adds playful energy to the animation.
- Glitch Effects: Great for modern and edgy styles.
How to Apply Transitions:
- Select your text layer.
- Go to the Effects Panel and choose a transition.
- Customize the speed and intensity.
4. Enhancing with Particle Effects
Particle effects add a dynamic touch to name animations.
Best Particle Effects for Name Art:
- Sparkle Effects – Ideal for glamorous text.
- Smoke & Fire Effects – Perfect for dramatic intros.
- Light Trails & Neon Glows – Gives a futuristic feel.
How to Add Particles in Alight Motion:
- Go to the Effects Panel and select Particles.
- Adjust the direction, size, and density.
- Use motion blur for a more realistic look.
5. Exporting in High Quality
To ensure your animation looks crisp and professional, export settings matter.
Best Export Settings for Alight Motion:
- Resolution: 1080p or higher.
- Frame Rate: 30 or 60 FPS for smooth motion.
- Format: MP4 for compatibility.
- Bitrate: Adjust for the best quality vs. file size balance.
Pro Tip:
- Use Green Screen Background for easy overlaying on other videos.
- Export in Transparent PNG Sequence for advanced editing.
Conclusion
Alight Motion provides powerful tools for creating eye-catching 3D name art animations. By selecting the right fonts, applying 3D effects, using smooth transitions, and adding dynamic particle effects, you can make your animations stand out. Experiment with different styles and techniques to develop your own unique video editing style!